
Getting your website listed on Google and other search engines is one of the best methods to get traffic to it. You notify search engines about your website by submitting it to them. Search engines will display your website in their search results once they are aware of its existence. It just takes a few easy steps to complete these submissions, which are free to do.
It can be extremely advantageous to submit your website to a search engine. In addition, if your website gets linked from other locations on the internet, search engines can find it on their own. Search engines are always looking for new links on websites they have already visited. And they’ll follow those links to visit websites they have never visited. Search engines scan new pages on websites to collect as much data as they can about them unless instructed not to. Upon completion of the new page scan, search engines choose whether to include the pages in their index and display them in search results.
You must be able to access and change your website’s settings and files before submitting it to search engines. You will require a sitemap in order to submit your website to search engines. A sitemap is a file which is kept on your server and it lists all of the essential pages on your website. Your sitemap is scanned by Google and other search engines so they can determine how your content is structured. A sitemap is frequently generated automatically if you create your website with a content management system (CMS) like WordPress. But you may also create a sitemap with WordPress by using different plugins.
The next step is to provide the search engines with the location of your website’s sitemap. Typically, a website’s sitemap may be found at a URL like “yourwebsite.com/sitemap.xml” on your website’s domain. This type of URL will show you a page with a list of URLs with a lot of code when you put it into your web browser.
Here, we will look at the process of submitting a website to Google.
1. First of all, you will need to find your website’s sitemap URL. Your sitemap will usually be located at “yourwebsite.com/sitemap.xml”
2. Then you will need to create a Google Search Console (https://search.google.com/search-console/about) account. This is where you will add your website’s sitemap.
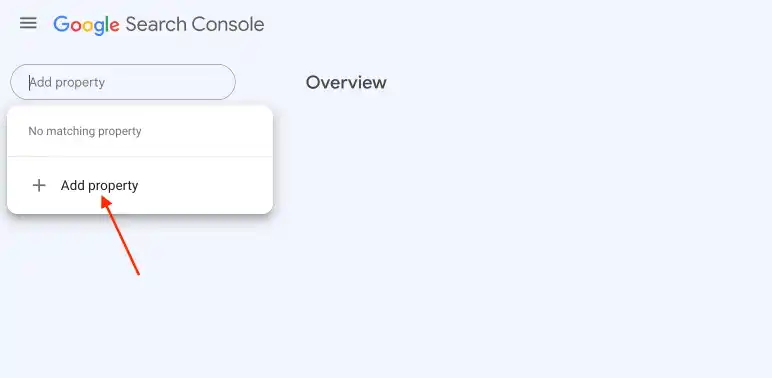
3. After you’ve created the account, log in to the account. The first time you log in, you will see a pop-up instructing you to add a property (your website). This needs to be done to verify your website with Google.
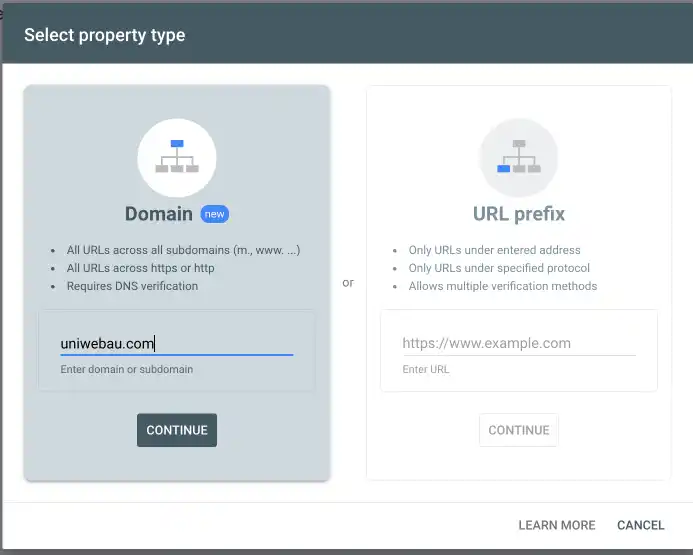
4. First of all, add your website’s domain in the “Domain” input without the http/https or www parts and click Continue.
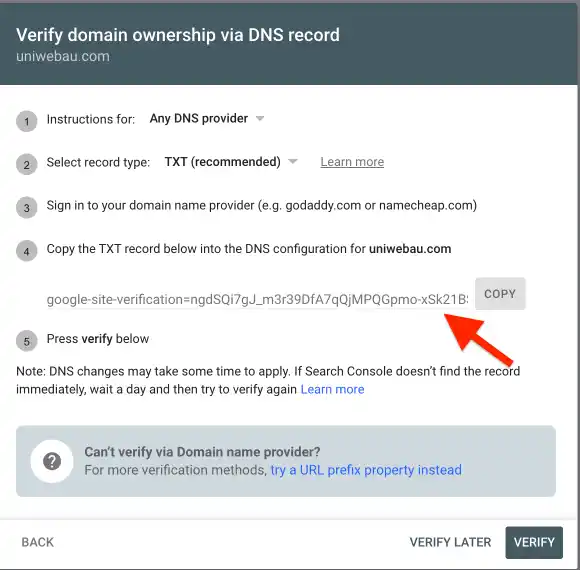
5. A “Verify domain ownership via DNS record” dialog box will show up next. Copy the TXT record from this dialog box.
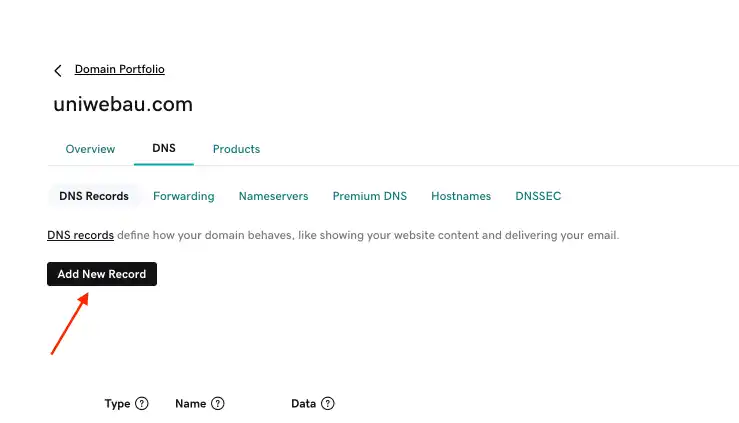
6. In a new tab, sign in to your domain registrar account and access your website’s DNS settings.
7. In the DNS management page for your website, add a new TXT record by clicking “Add”.
8. You can fill up the TXT record you copied earlier here and click “Add Record.”
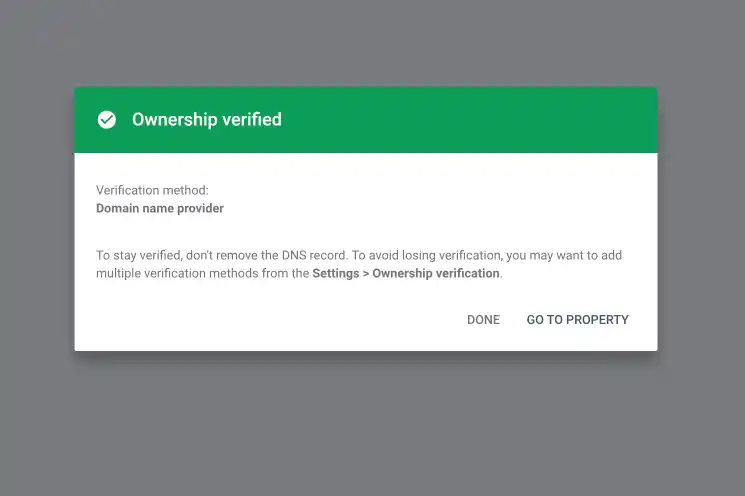
9 .Now you can go back to Google Search Console and click “Verify.” The DNS record changes can take anywhere from a few hours to 48 hours to update. Upon successful verification, you will see a confirmation message.
10. After your website has been verified in Google Search Console, you can go to the website’s dashboard page and click the “Sitemaps” link on the left-hand side.
11. Next, under the “Add a new sitemap” heading, paste your website’s sitemap URL into the input box and hit the “Submit” button.
12. Your website’s sitemap has now been submitted to Google and the search engine will crawl your website.
13 .After Google has crawled your website this way, your website should show up in Google search results in a few weeks.